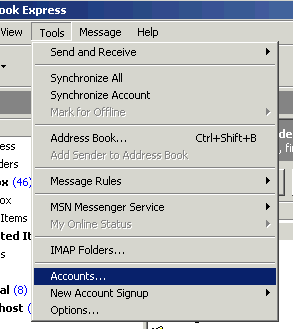
Start Outlook Express. Go over to the Tools drop-down menu and select the Accounts... menu item.
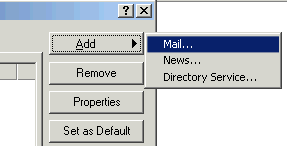
You will now see a screen called Internet Accounts. Click on the Add
button, followed by Mail... to start the Internet Connection Wizard.
Follow along this wizard to set up your new e-mail account.
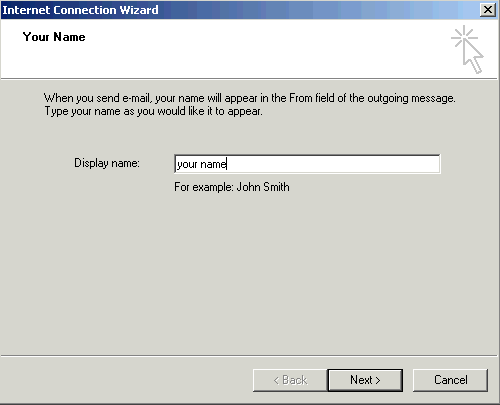
The first screen prompt will ask you for a Display name. The Display name is a name that
will appear in the E-mail you send out. When people
receive your e-mail, they will see what you type in this
section in the From section of Outlook Express. It doesn't
matter if you type in all caps or lower case.
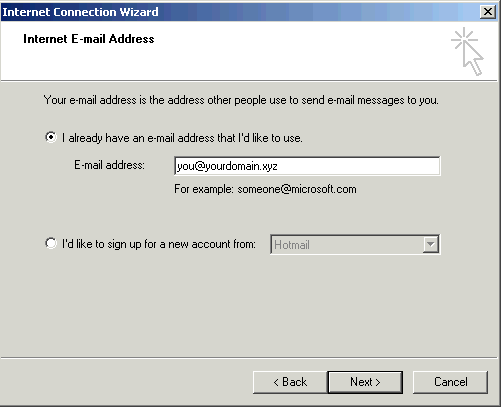
The next screen prompt handles your Internet E-mail Address. Click on the first option and then type in your
e-mail address. Once you have finished, click the Next button.
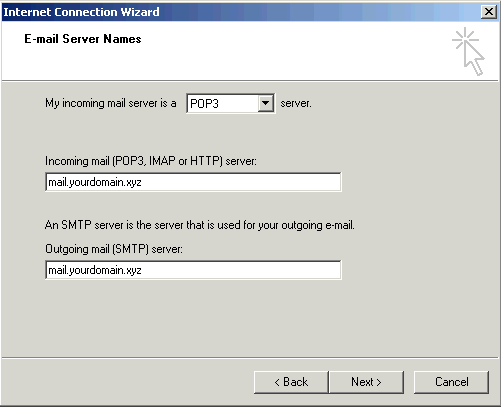
The next screen prompt to
appear will be E-mail Server Names. The first box is defaulted to POP3. POP3 stands
for Post Office Protocol version 3. This is the type of server
that we use. Make sure the box has POP3 selected. In
the incoming mail (POP3 or IMAP) server section, you
need to type in mail.yourdomainname.com. This must be
in all lower case; no spaces. In the outgoing mail (SMTP)
server section, you need to type in
smtp.yourdomainname.com. This must be in all lower
case; no spaces. Once you are finished with that section,
click the Next button to continue.
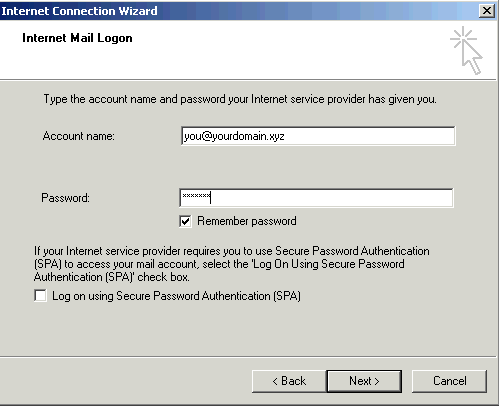
Next is the Internet Mail Logon
screen prompt. POP account name is your E-mail user
name (for this example username is the E-mail username). You
must type in all lower case for this section. Password
is the E-mail password for this E-mail
user name This section also needs to be in all lower
case if you use letters for your password. Make sure that
there are no spaces also. Log on user Secure Password
Authentication (SPA) does not need to be checked. Click
the Next button to continue.
You have now completed the creation of a e-mail account
in Outlook Express. Click the Finish button to complete
the wizard process.

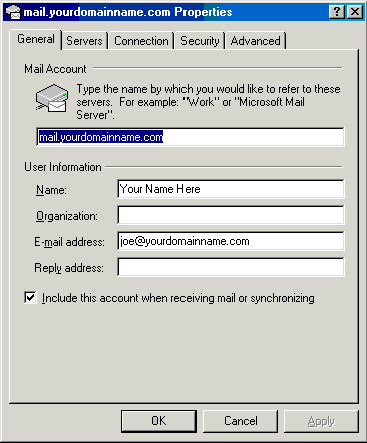
When the wizard process ends, you should be back at the Internet Accounts screen. This screen will now show
the account you just added. To configure your e-mail options, click on the Properties button.

The first item you see is the General tab where you can set your account properties.
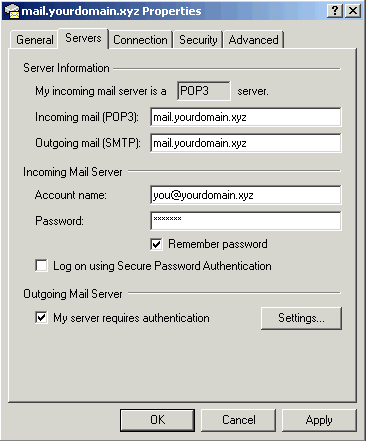
Now click on the Servers tab. Make sure that the box labeled My server requires
authentication is NOT checked. If it is checked, then un-check it. Then click
on the OK button to register your settings.
Again, you should be back at the Internet
Account screen. Click on the Close button to close the screen. You are now completely finished with
setting up your e-mail account and settings to work with Outlook Express!
Click here
to view the offical Outlook Express FAQ sheet.
|